Wednesday, February 27, 2019

AAPS Wireless Networks

ITD is making a push to remove old legacy systems still in place. The wireless network AAPSWF is going away and will be turned off during spring break. We have been working toward this goal for a while now and most things should already be moved to the proper wireless network, but please verify that you are no longer connected to AAPSWF. Please do this on all devices that may be in your room as well.

How do I check my wireless network?

It is very easy to check which wireless network you are connected to. Simply click on the wifi symbol on the menu bar (upper right hand corner by the time). The network with the check mark is the one you are connected to.


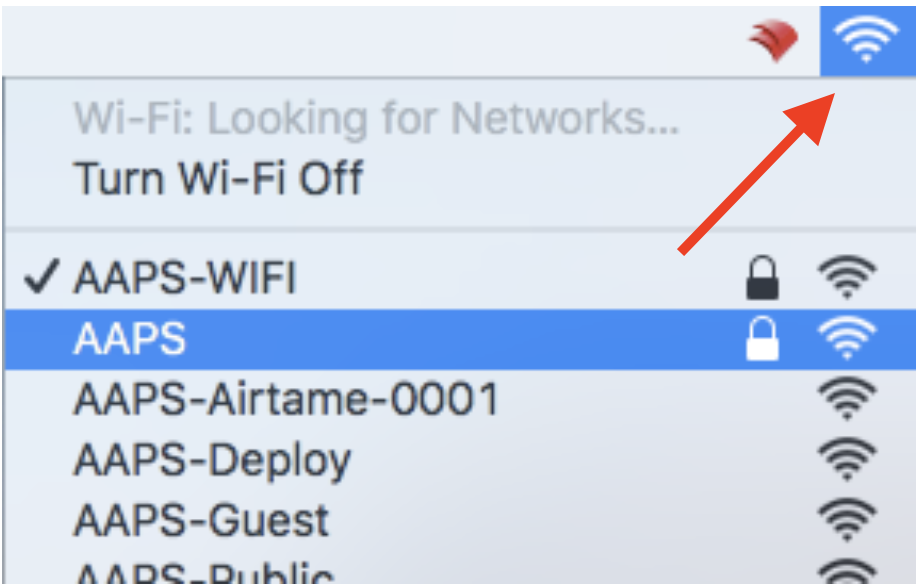
What network should I be on?

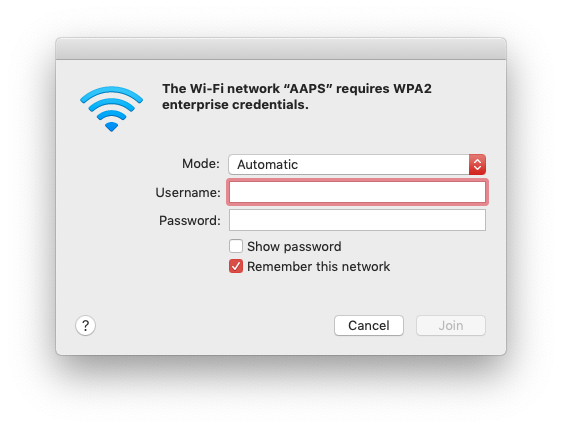
There are few different options for wifi when you are at school. Here are the differences in the networks:


AAPS – This wireless should used by staff on district-owned devices. Log into this network with your Active Directory account. If you have a new teacher laptop, you should be connected to this network already.


AAPS-WIFI - Used for district-owned devices only. This is the replacement for the AAPSWF network. This network does not get used with personal devices.


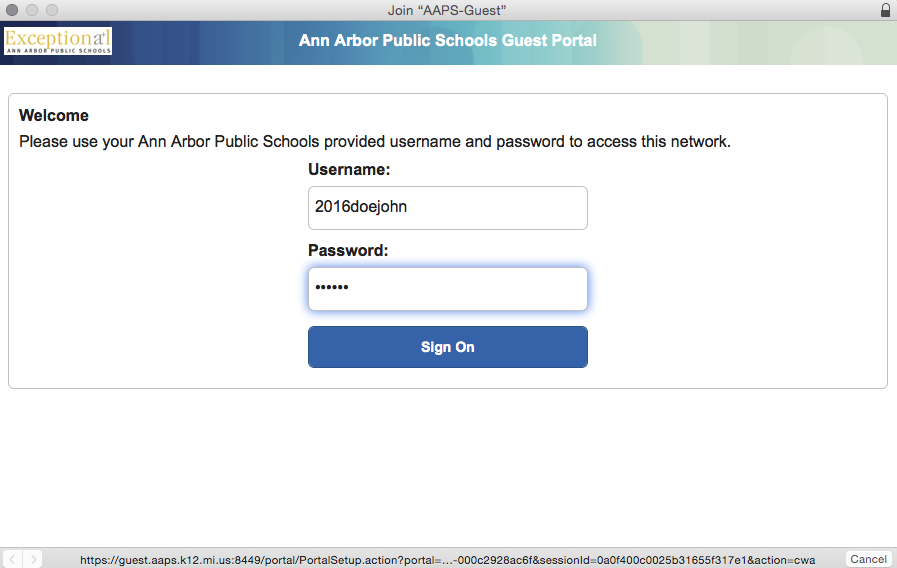
AAPS-Guest - Students or staff using “Bring Your Own Technology” (BYOT) in class need to enter their Active Directory Login/Password and accept the Use Agreement to access this network
Macintosh HD:Users:hotaling:Desktop:Screen Shot 2015-09-11 at 2.11.09 PM.png


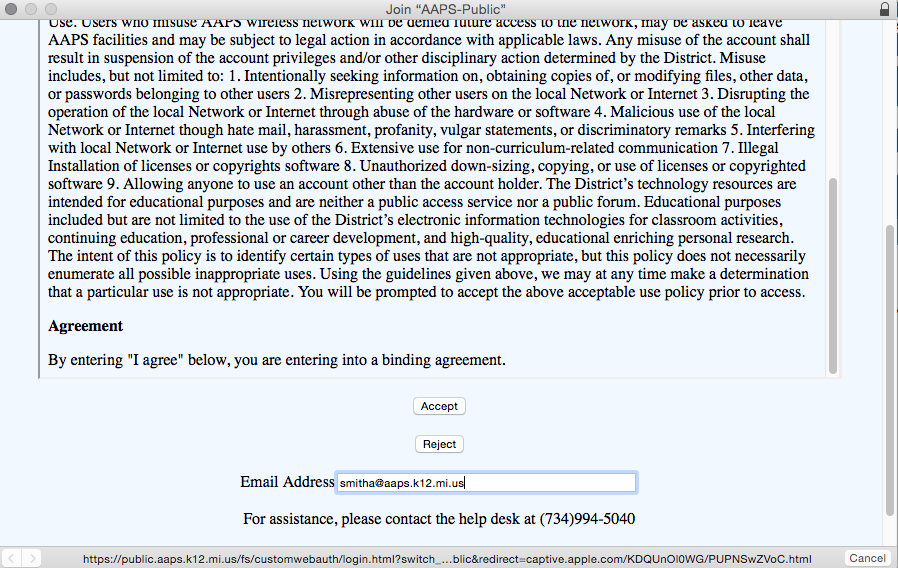
AAPS-Public - For visitors, parents and community members.
  • Users must provide their email address and accept the Use Agreement to access this network. The setup is similar to the screens you see when visiting a network at a hotel or coffee shop.
  • The email does not have to be an aaps.k12.mi.us email address.
Macintosh HD:Users:hotaling:Desktop:Screen Shot 2015-09-11 at 2.12.11 PM.png


These networks will require students to re-authenticate to the network after a period of two hours.

What do I do if I’m connected to AAPSWF?

Please select a different network based on the definitions above. In general, if the device is a school-owned teacher laptop, you should connect to the AAPS network. If it’s a school owned student device or desktop that needs to be on wifi, it should be connected to AAPS-WIFI. If you can not get connected to the proper network, please put in a help ticket.


Wednesday, February 20, 2019

School Messenger

School messenger is a simple way for teachers to communicate with students and parents that is integrated into PowerTeacher.  Below are simple instructions on how to use Messenger and send a test message.  If you would like more detailed instructions please see the link below.  


 Sending Your First Broadcast 

Step 0: Open Message Sender 
1. Log in to PowerTeacher 
2. Click on Message Sender on the left hand menu 

image.png
Step 1: Subject & Recipients 
1. Enter a Subject (e.g. My First Broadcast) 
2. Select a Type (Default is Teacher Messaging) 
3. Click Add Me and check your contact details 
4. Click the green Continue button in the lower right when you are sure your contact details are correct 


Step 2: Message Content 
1. Verify “From” details 
     a. From Name 
     b. From Email 
     c. Reply to Email (Can be different than “From Email”) 
     d. Subject 
2. Compose Body of Email 
3. Click the green Save button in the lower right 

image.png

Step 3: Review & Send 
Your Broadcast should contain 1 recipient. Click Send Now on the lower right to get your Test Broadcast underway. 

Check your Email 
Now check your email. You should see the message you just sent! 

Review your Broadcast Report 
Finally, you should have also received an email report summarizing your Broadcast. After each Broadcast, an email is sent with a report displaying the delivery results. 

Detailed Instructions 


Thank you Lena Hand for creating this how-to!

Tuesday, February 5, 2019

Seesaw

This year AAPS began using Seesaw in all elementary and K-8 buildings. In order to make the process as streamlined as possible, you can log into Seesaw via Clever and classes are already rostered.  

So, what is Seesaw?


Seesaw is a platform for student engagement that inspires students of all ages to do their best, and saves teachers time! Students use creative tools to take pictures, draw, record videos and more to capture learning in a portfolio. Teachers find or create activities to share with students. Families only see their child's work and leave comments and encouragement.

Here are some how-to tips to get you started if you are new to seesaw:

Basics:

Beyond:

Specials Teachers

Specials teachers are handled a little differently than classroom teachers. Specials teachers should be added as a co-teacher to the classroom teachers class. This helps keep all of the information in one place and accessible to parents.
  1. Tap your Profile Icon and select the class you want to add a co-teacher to.
  2. Tap the wrench in the top right corner and tap 'Manage Teachers'.
  3. Tap on 'Invite Teachers', type in your co-teacher's email address, and tap Send.
  4. Your co-teacher will receive an email with a special invite link. They should click the link to accept your invite.
Need more of this?  Further reading can be found at  https://help.seesaw.me/hc/en-us